Yes. With the help of special API commands, which can also be set and saved as a preset, you can tell WLED in which color and brightness each individual pixel must be controlled. This is how an image can be displayed. If you want to manually convert an image into an API command, it would take a lot of time. However, there is a tool (PixelArt Converter) that helps. This means that anyone without WLED API knowledge can convert an image into an API command that is understood by WLED software. The source code of this tool can be found here (ext. link). The following describes how it works. Essentially the whole thing consists of three steps:
1) Download WLED PixelArt Converter from GitHub to your PC and open it in a browser
2) Select image, set parameters and convert
3) Send the result (API command) to the WLED controller and, if necessary, save it as a preset.
To use the WLED PixelArt Converter you have to download the file https://raw.githubusercontent.com/werkstrom/WLED-PixelArtConverter/main/pixart.htm (ext. link). When the file opens in the browser, right-click and then click "Save As" or "Save Page As". You can then open the saved file in the browser like a website: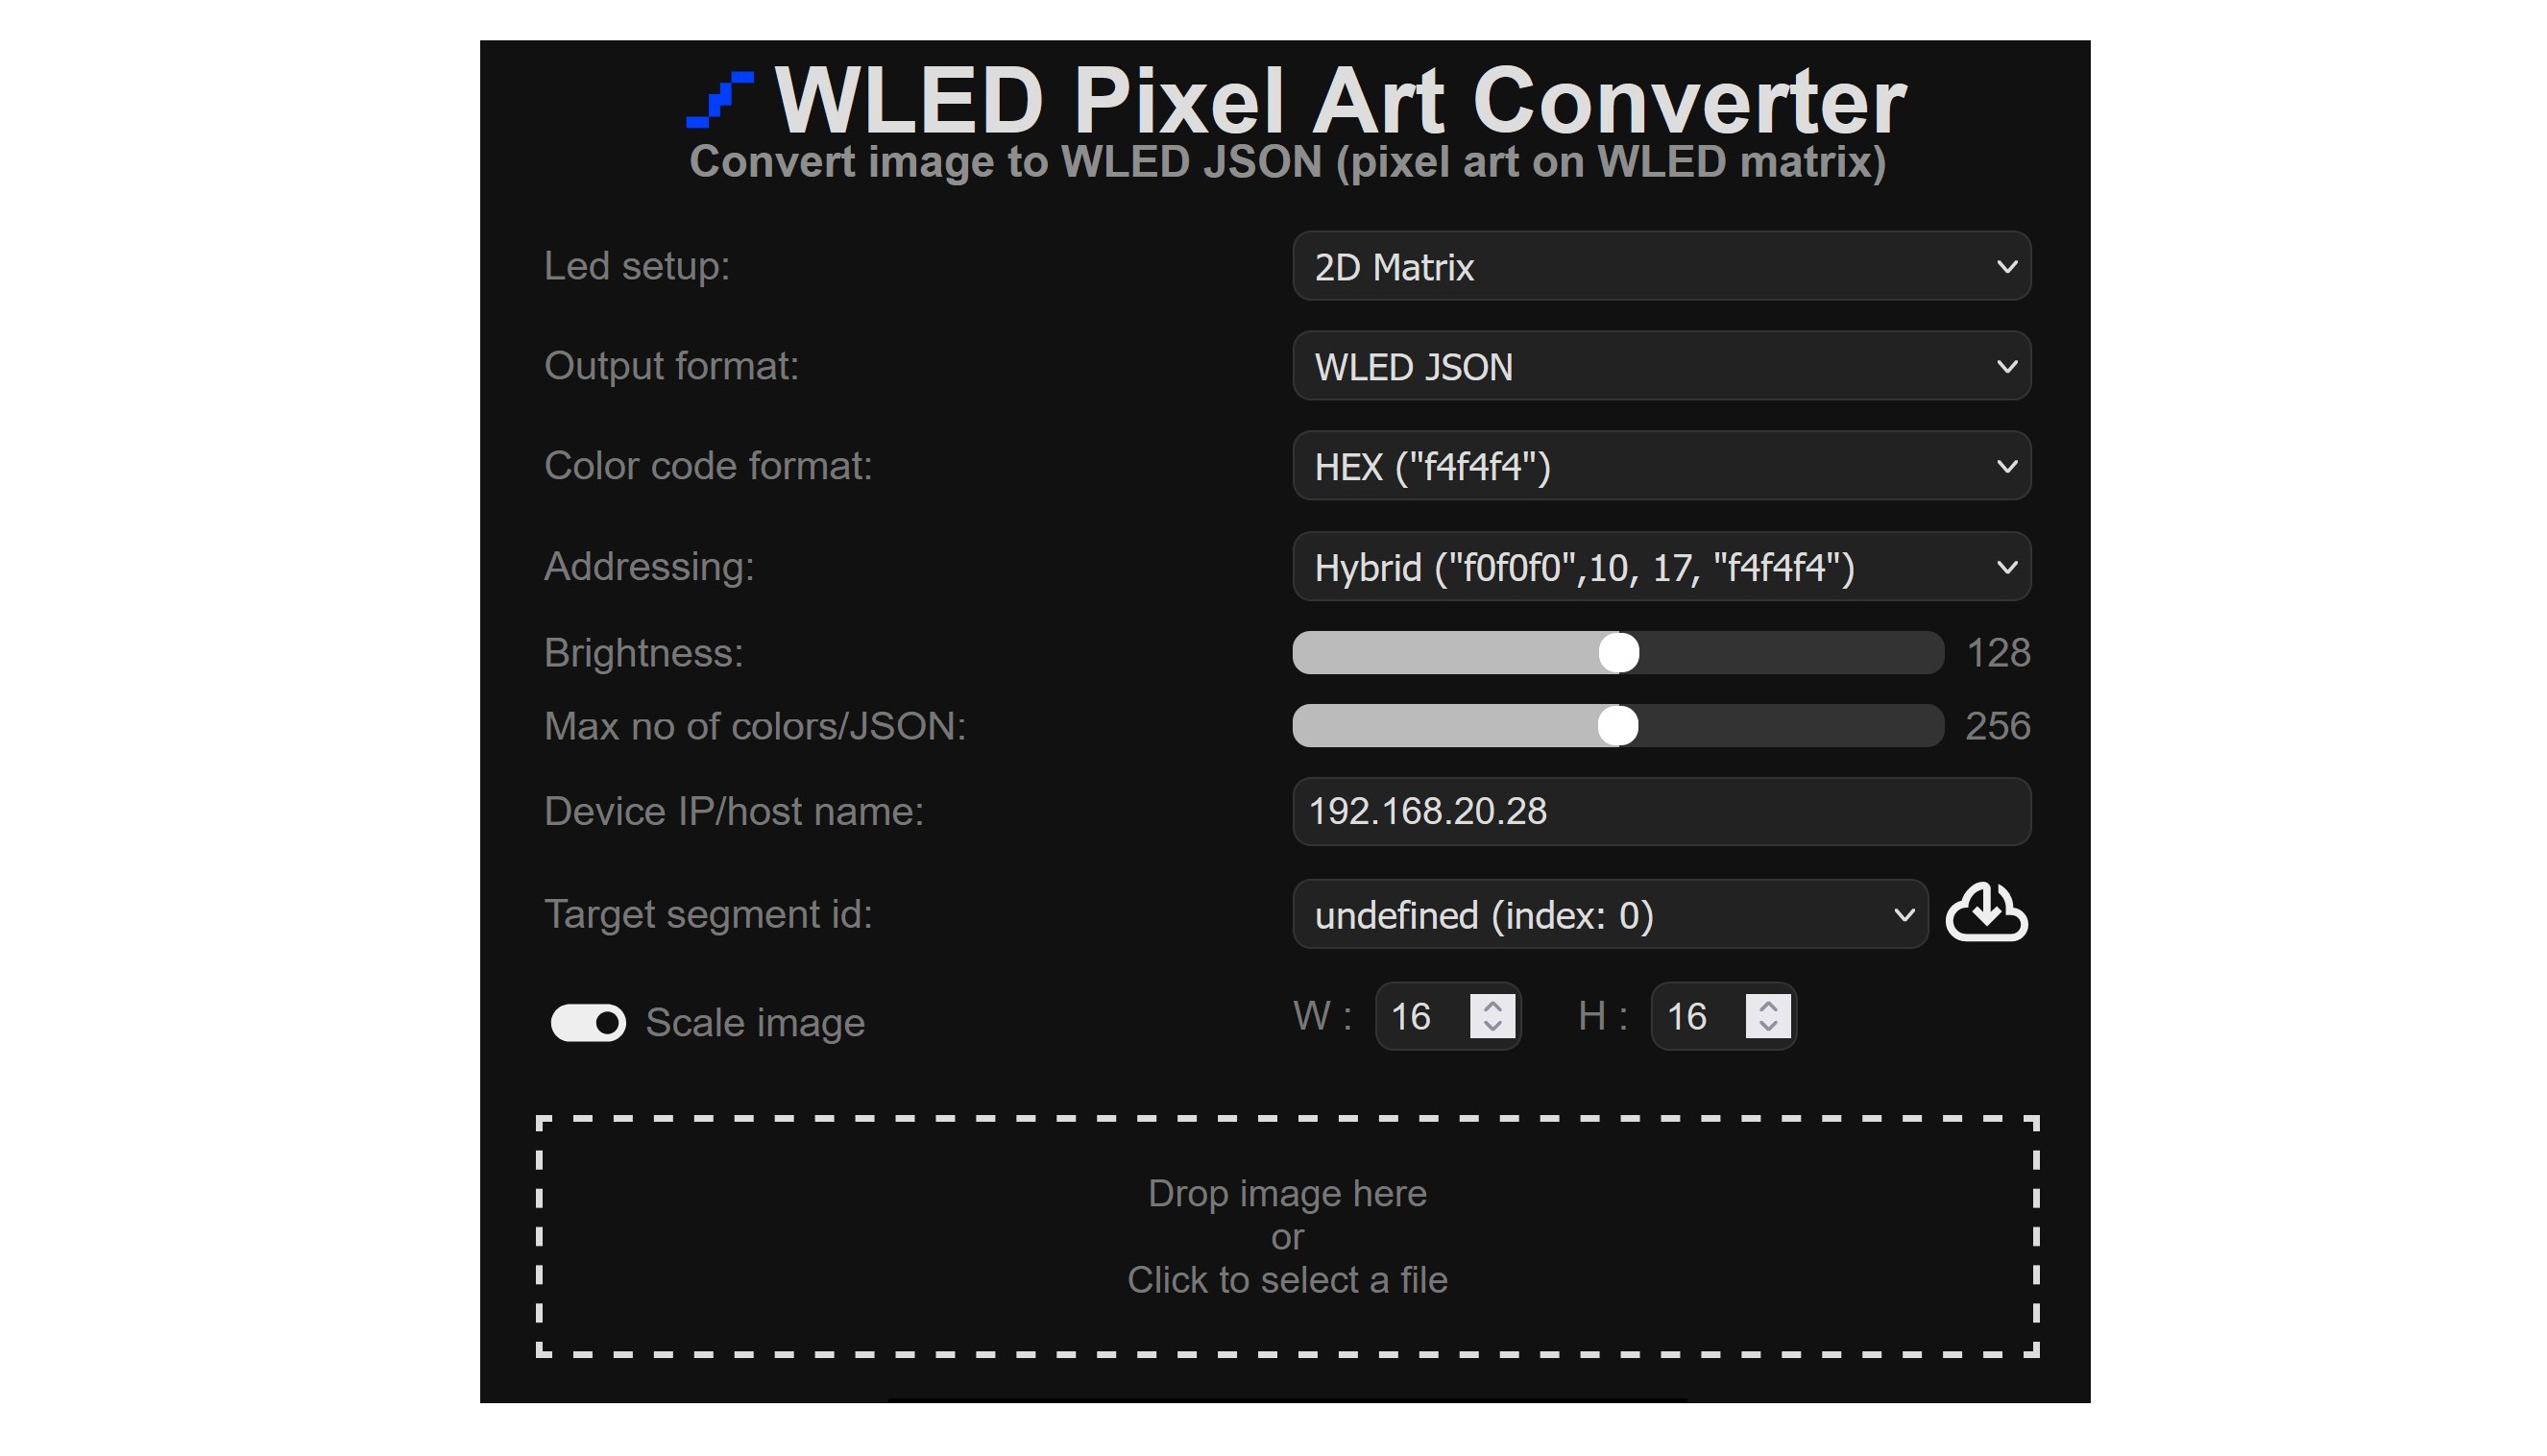
Here you have to enter the IP address of your own WLED controller under "Device IP/host name:". Then click on the "Download from cloud" icon. In the simplest case, if you have not defined any segments in WLED itself, the following appears under "Target segment id:": "undefined (index: 0)". Normally you should turn on "Scale image" and enter the dimension of the matrix (X/Y). Next, select the file with the image. The original image and the generated API command, immediately appears below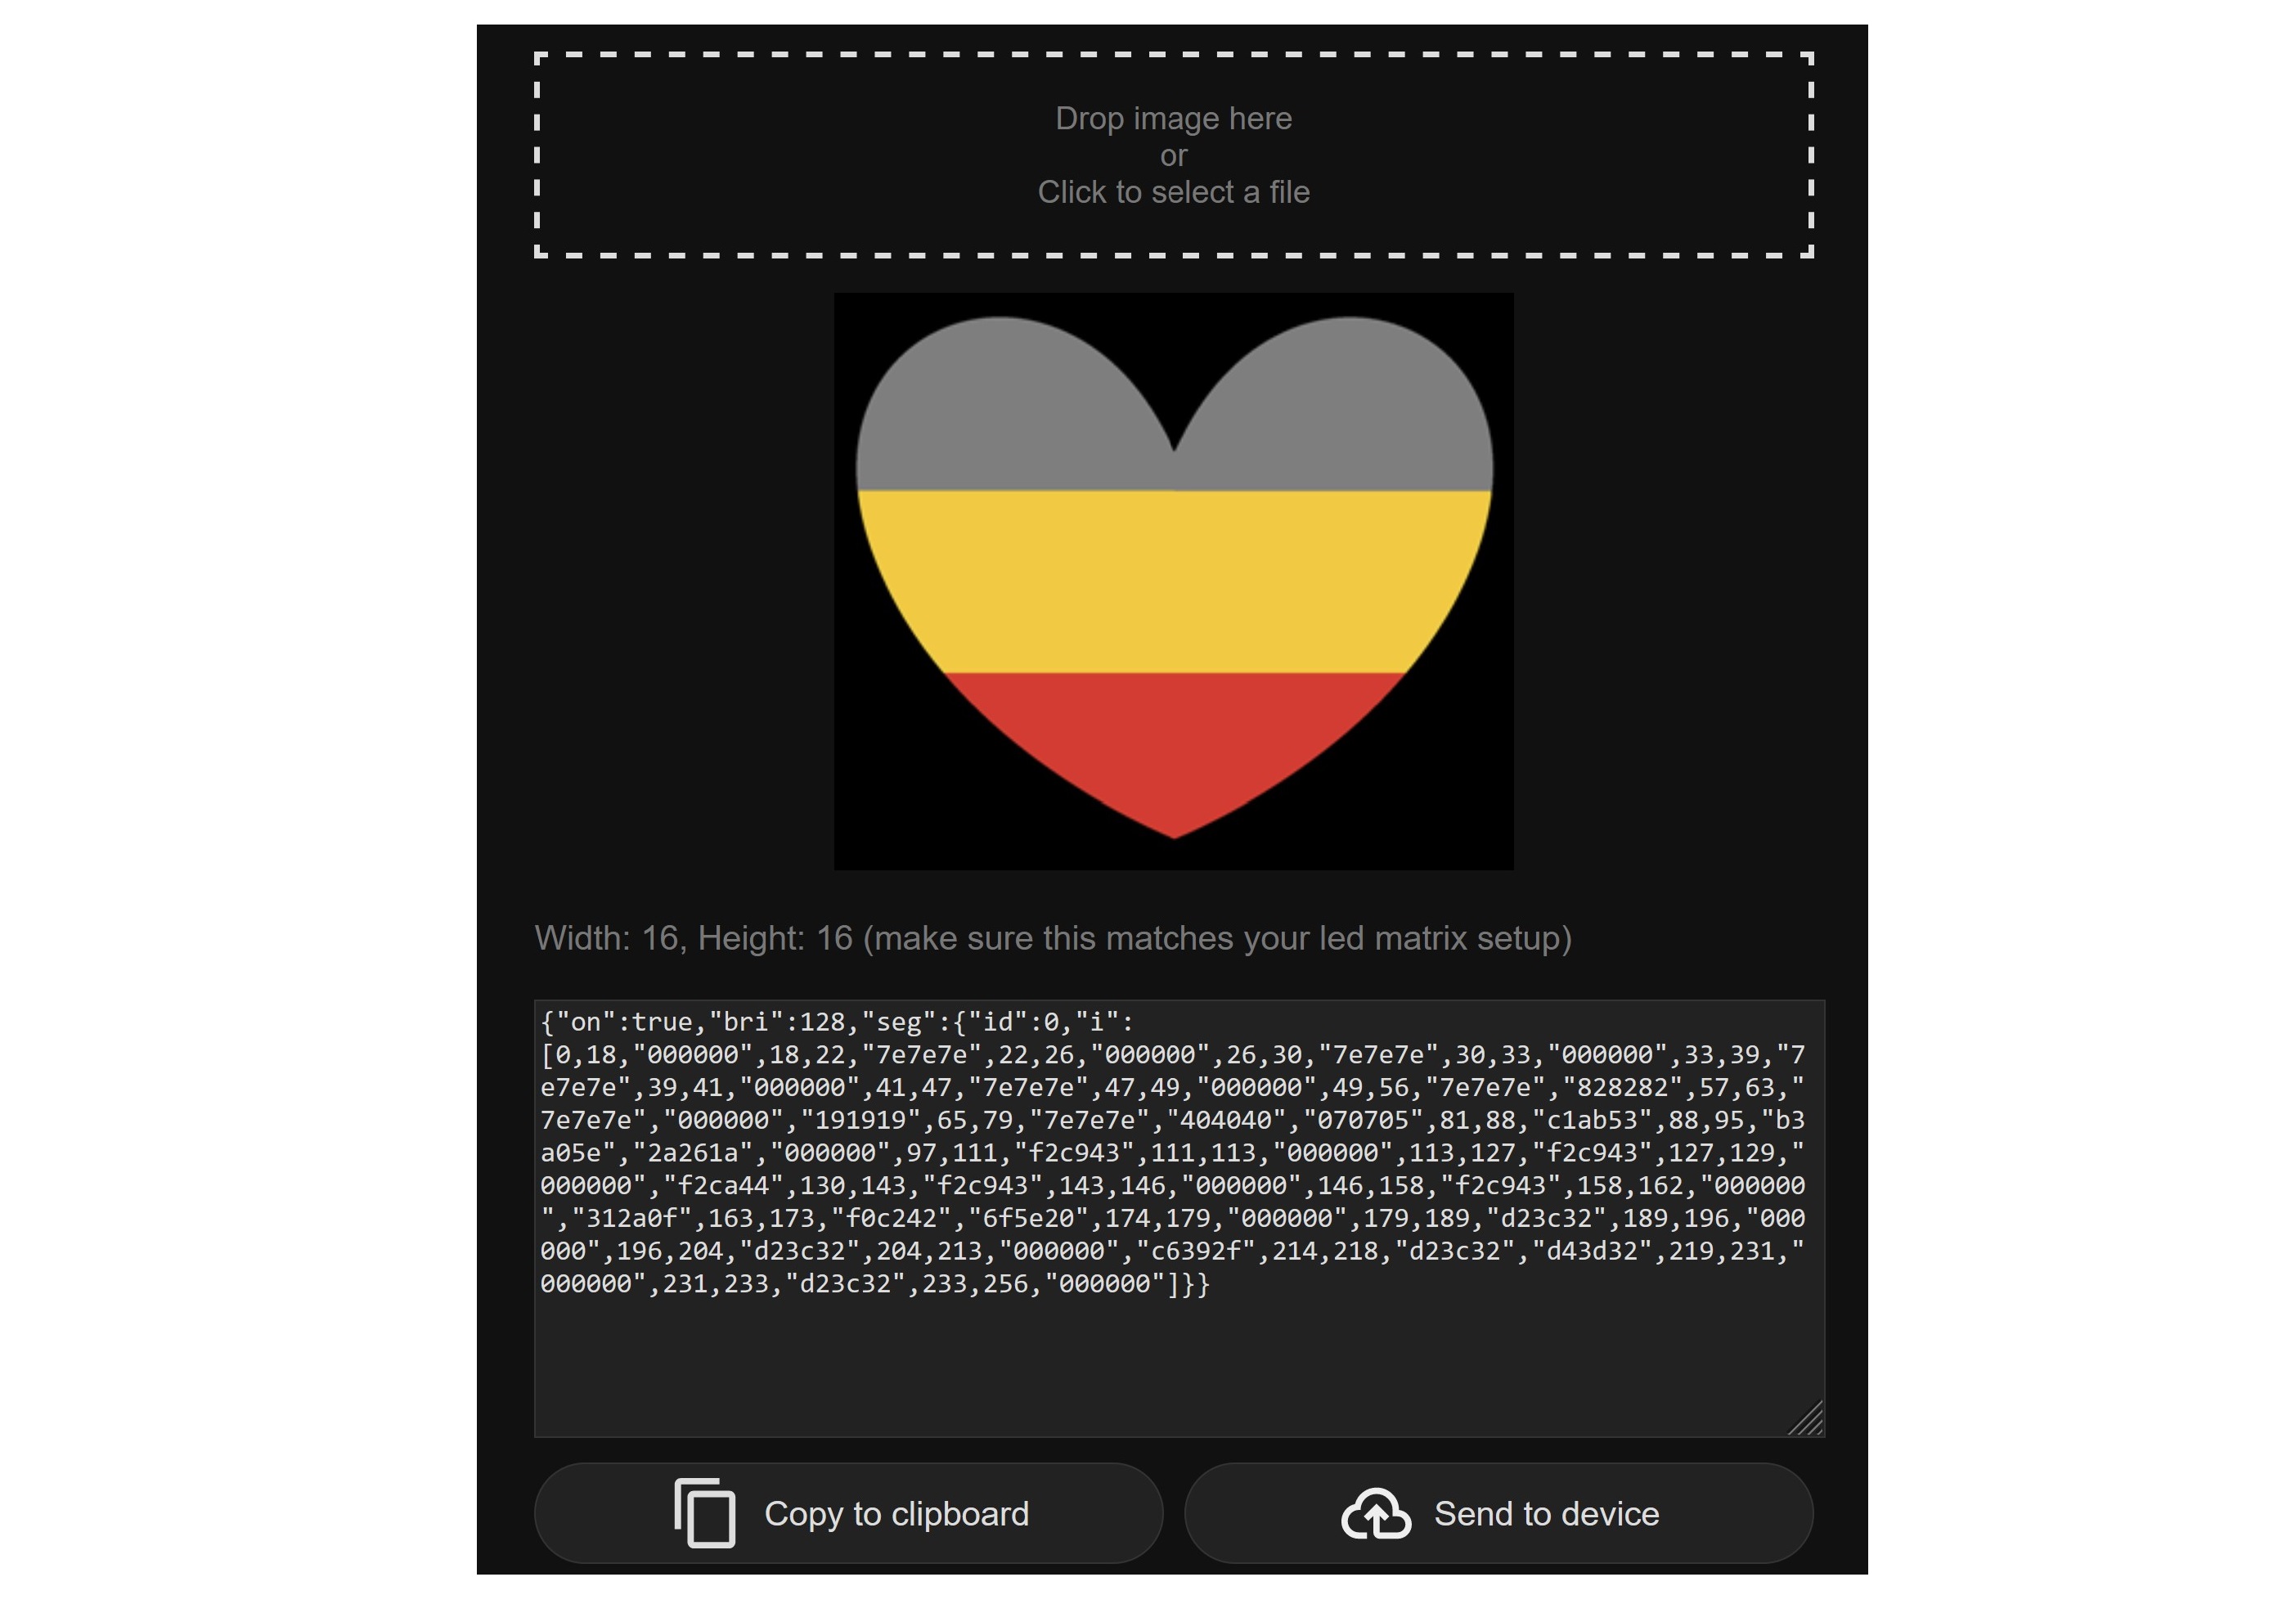
as well as a preview of how LEDs are controlled: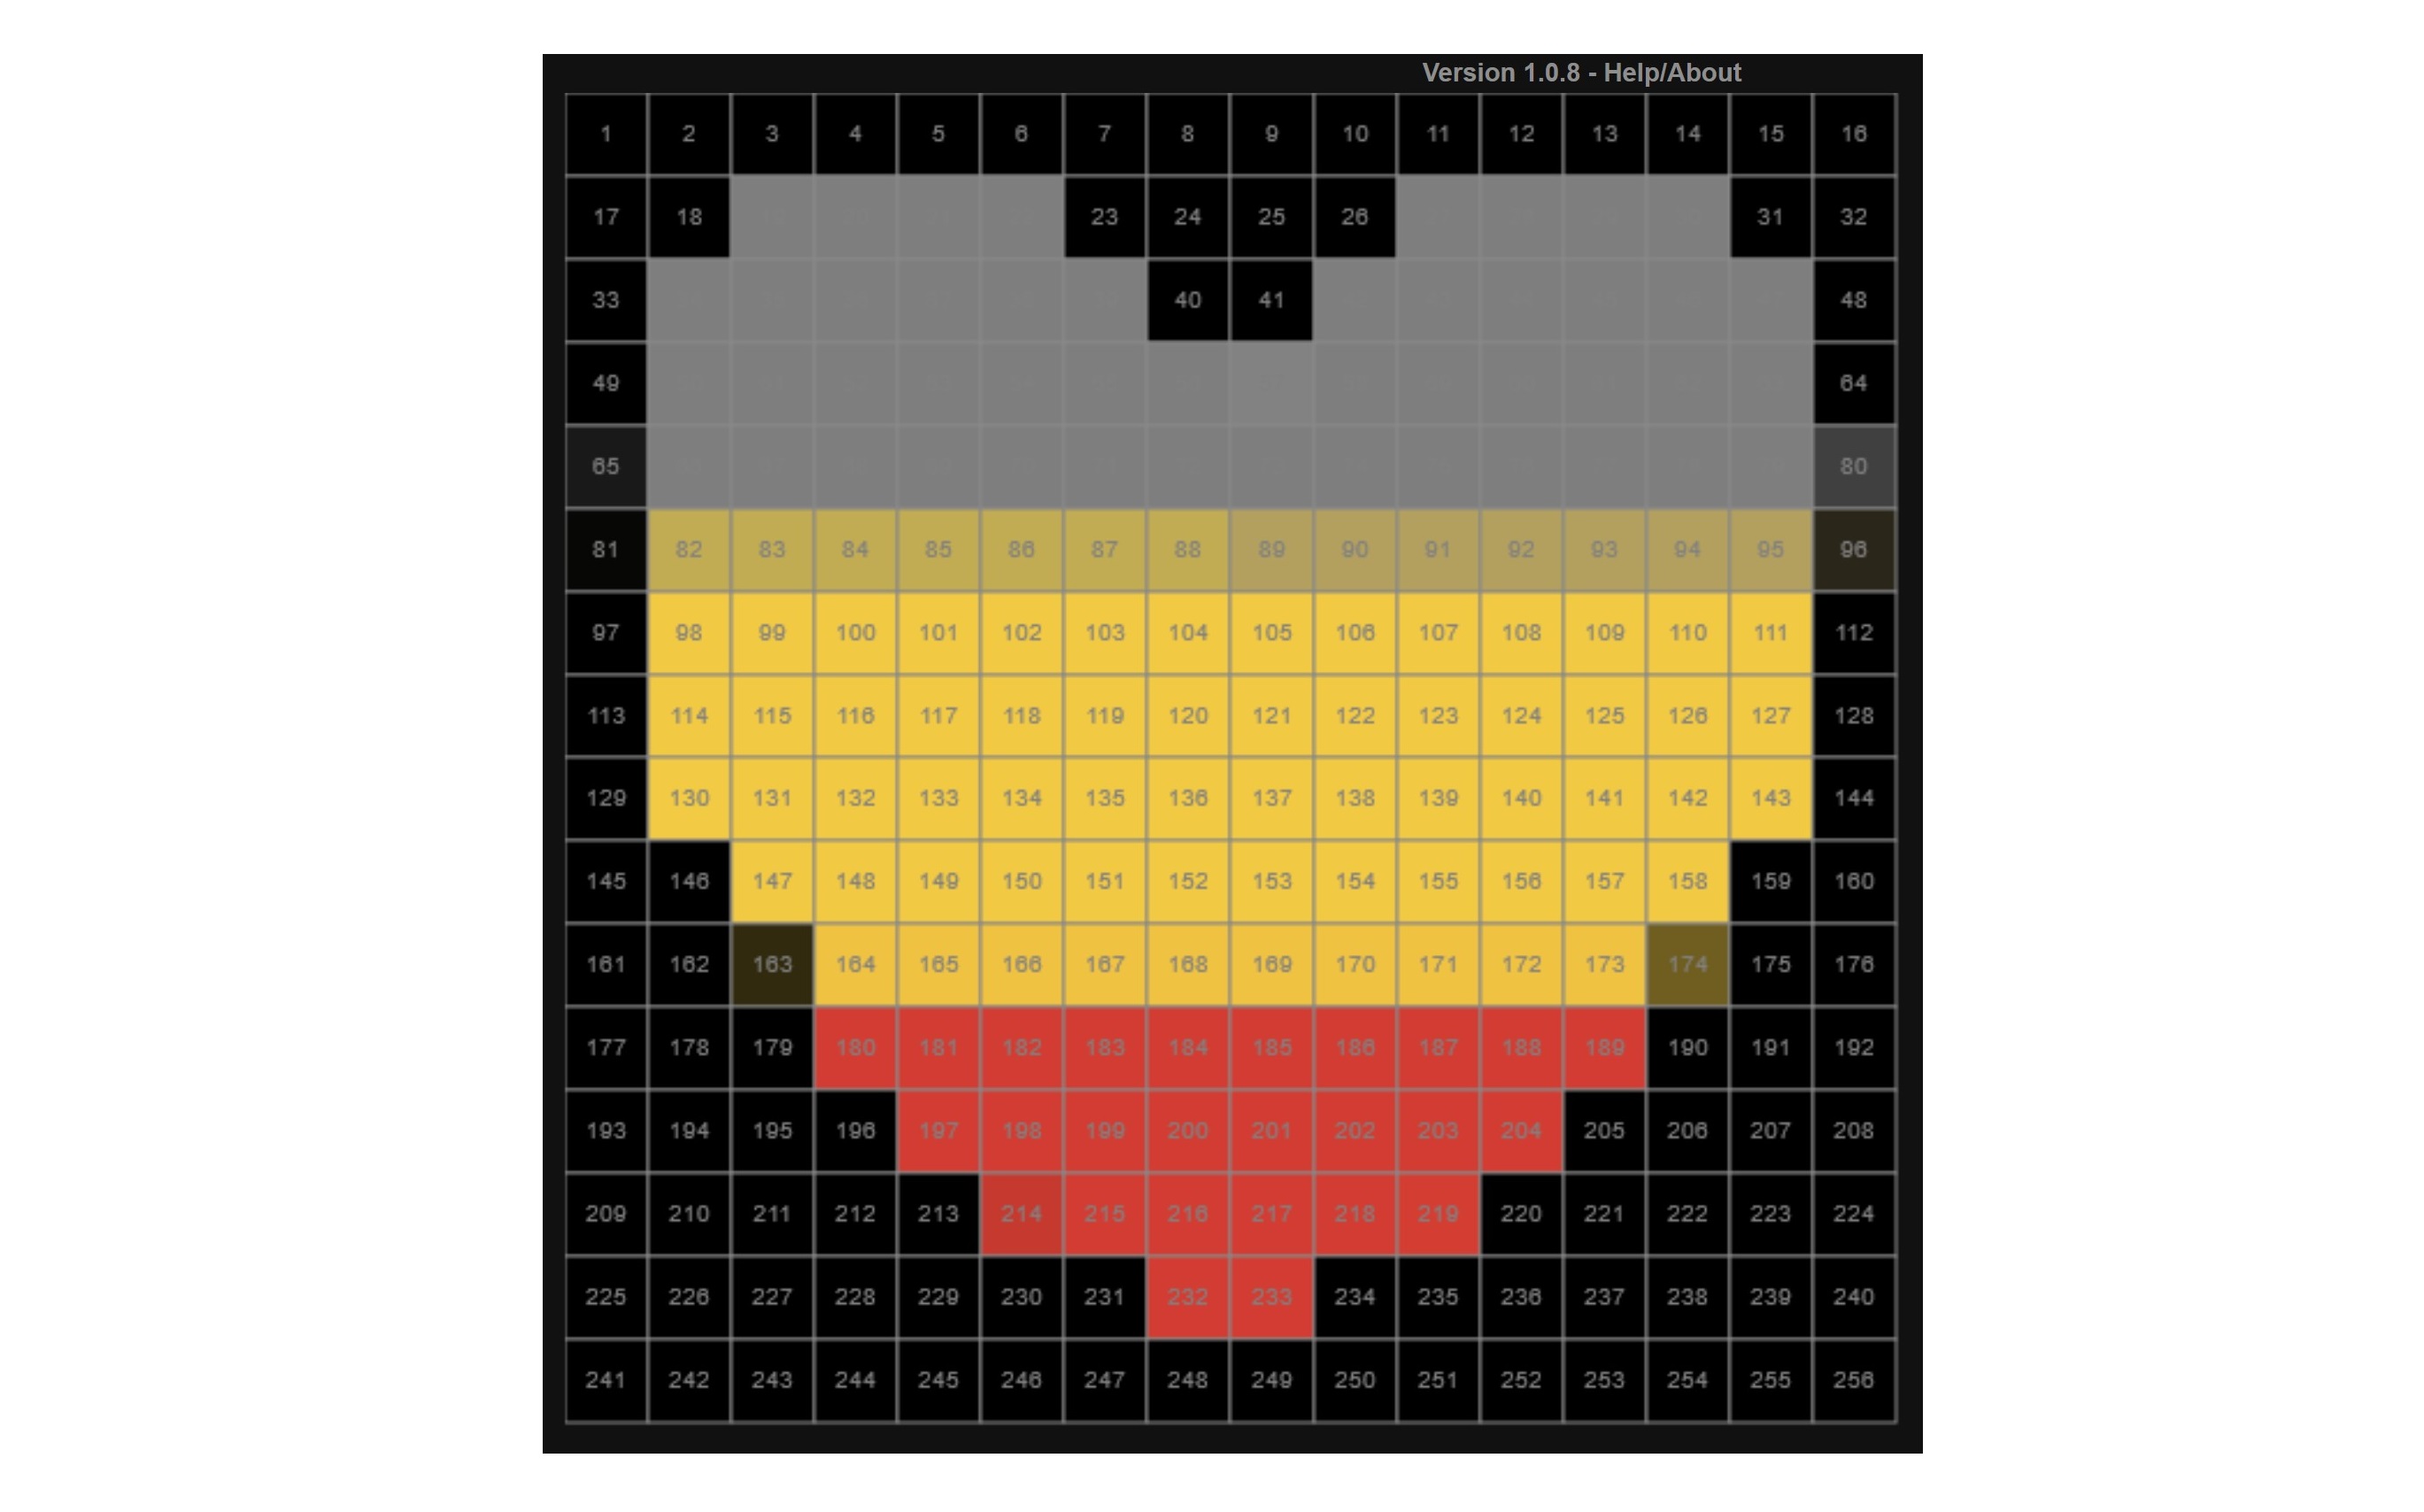
With "Send to device" you can send the image directly to the WLED controller. The result then looks like this: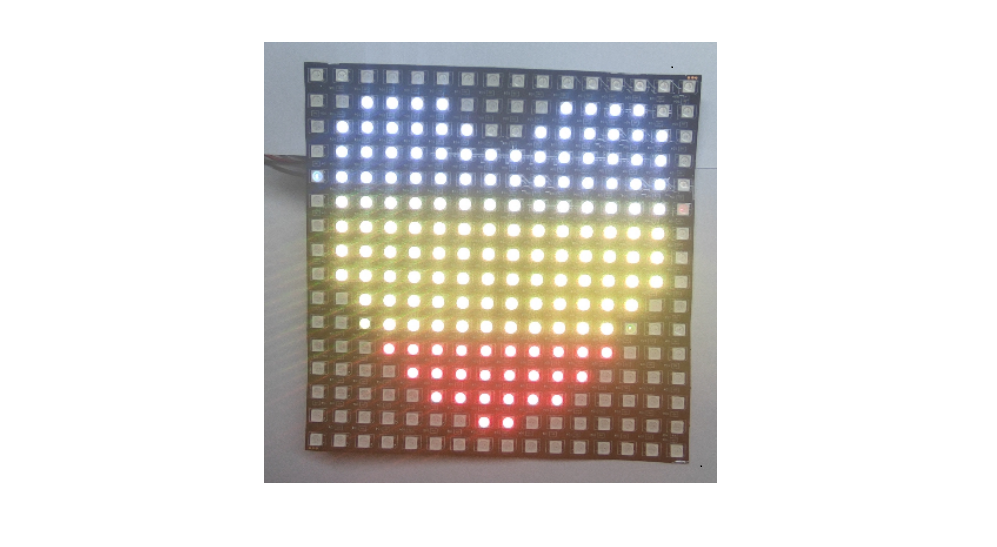
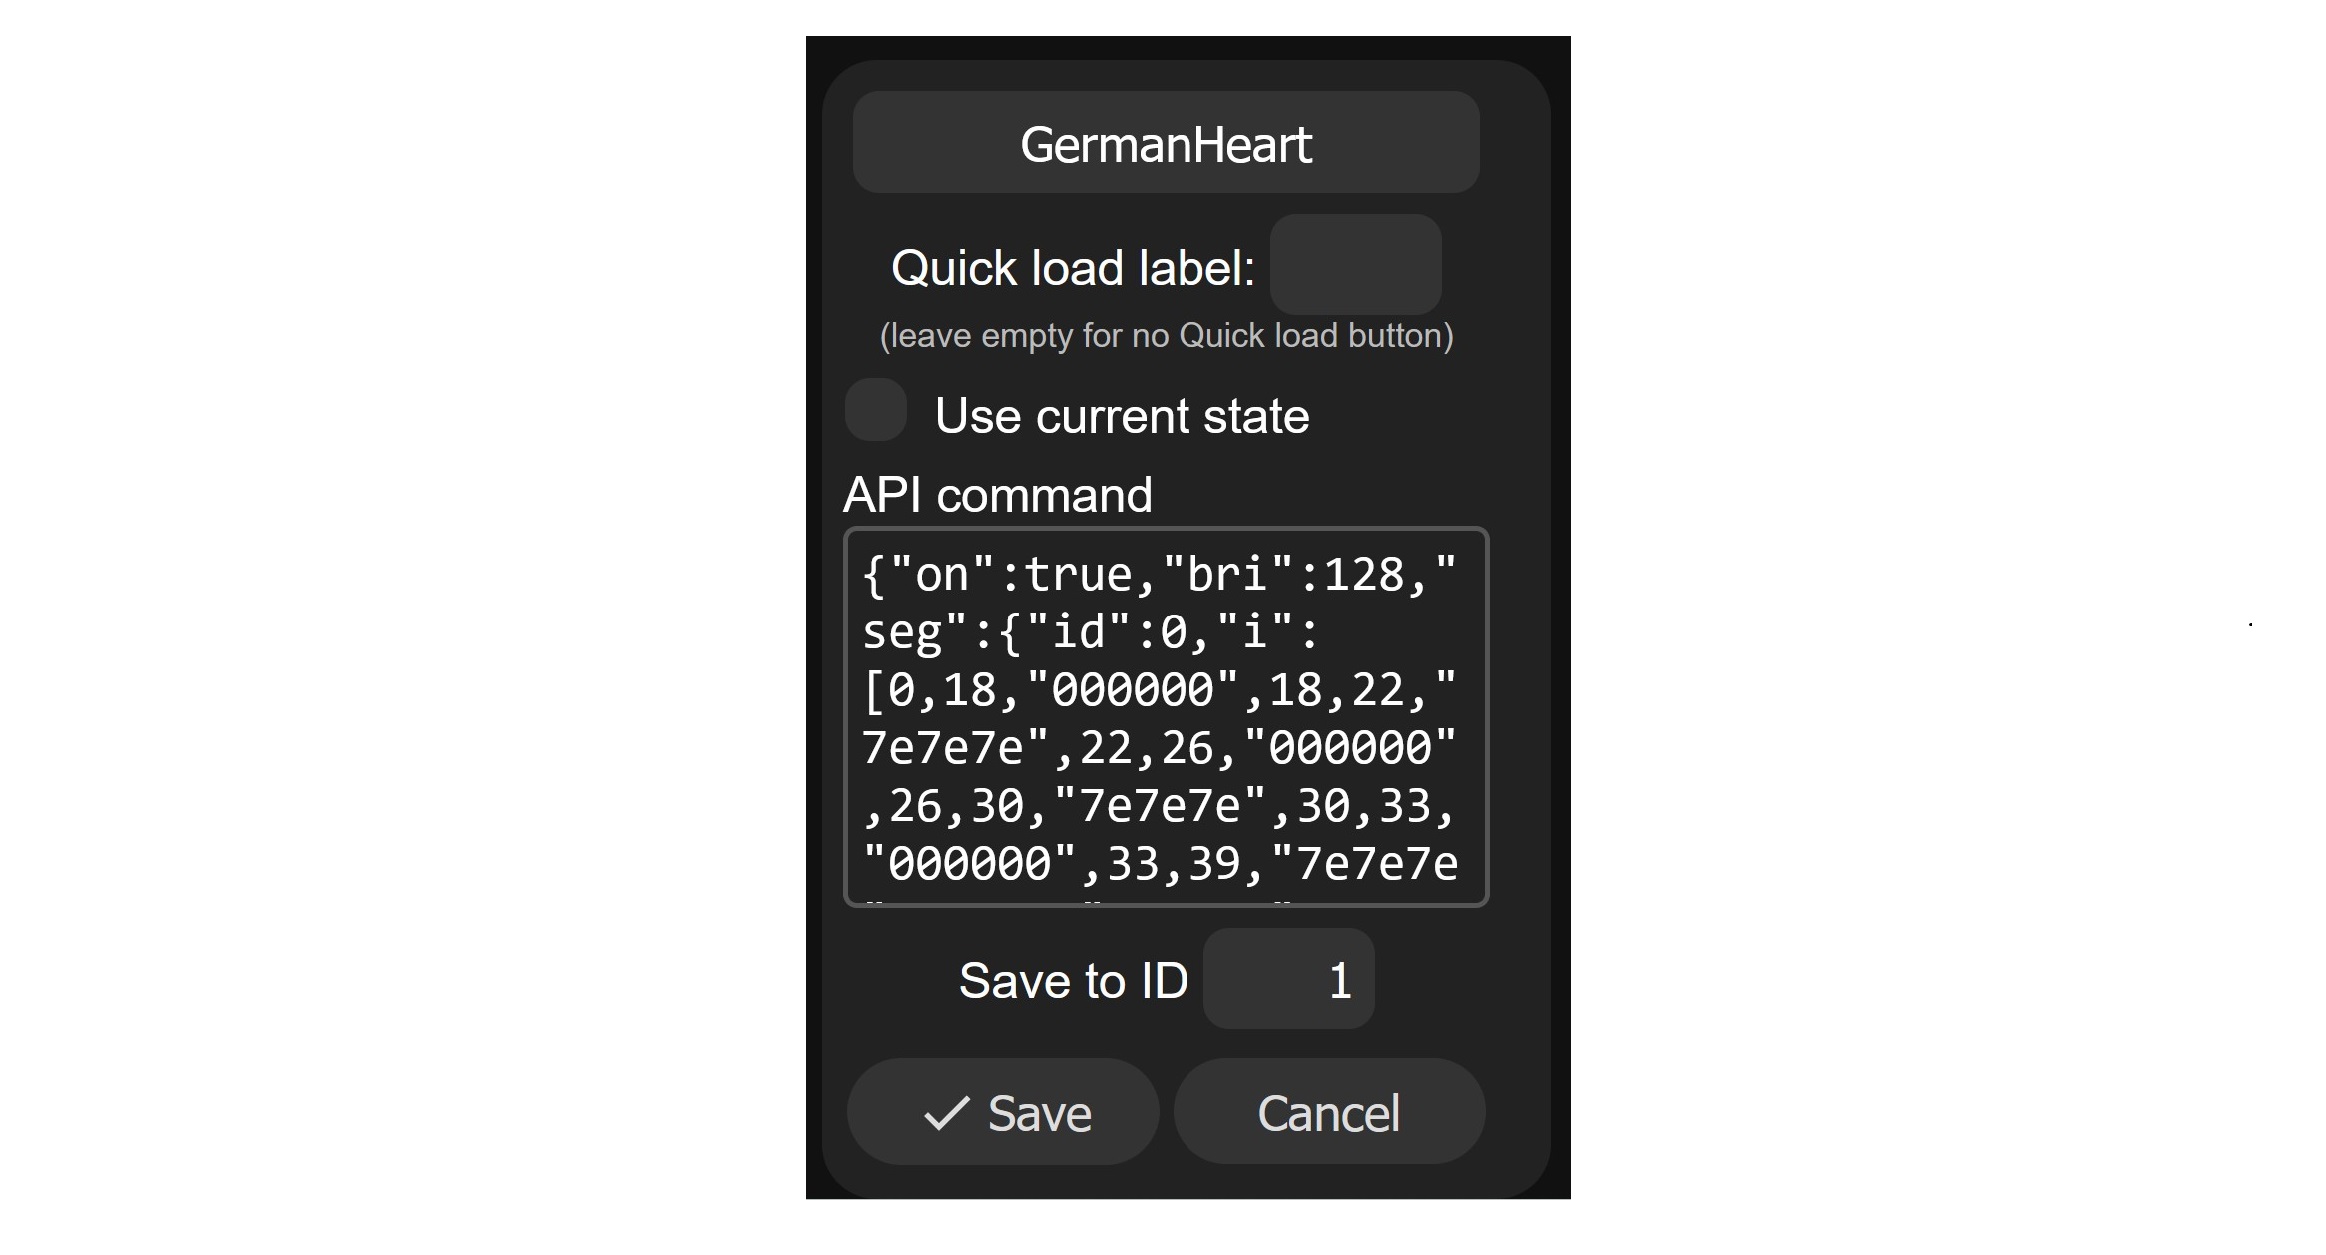
In order for the image to be permanently saved on the controller, you have to copy the API command and then save it as a preset in the WLED controller. To do this, create a new preset, give it a name, deselect the "use current state" option, insert the API command into the API input area ("API Command") and save the preset: